Actually it's now I'm rewriting what I've written on one of my facebook notes. but maybe you guys are still getting confused about how to set up Palringo on your mobile phones or PCs. alright then, first of all I'd like to let you know about what the Palrigo is. Palringo is a pretty cool instant messaging client app with the multiple accounts all in one that you can use at once on it. This app has many features and advantages such as sending pictures, voices, a Map that will give you the ability to see another online Palringo users location you've added into your Palringo account, low cost, fast and stable. This app can be used by all the mobile phone and PC users, it supports Java,Symbian,Windows mobile, iPhone, Android, windows PC, and Linux. if you wanna get more info about Palringo then feel free to visit this site or download the latest version of palringo which is now v2.3 directly from here for free..!! :) and choose the right Operating System (OS) who suits your devices OS'.
well, I think it's enough introducing Palringo to you all and let's go to the main part of our topic. :) here I'll guide you step by step setting up Palringo on your devices as well as possible.
Note : these following steps should be just the same as another devices' and PCs' (in this page I'll give you some screenshots of setting up the Palringo on windows phone/mine) but nothing to worry 'cuz as I said before that these following steps should be just the same as another devices' or PC'. :)
 1. First of all , find out the palringo installer file where you put it on your device that you've downloaded from the palringo download site I gave you above and then click/select on it to start installing Palringo.
2. Choose a location to install palringo on your device, here you can choose whether on the internal storage or external storage (this screenshot is a sample of my palringo v2.2 installation progress) if you download from the palringo site today , you'll probably get the latest version that is v2.3 and you won't be able to choose to install palringo on your external storage 'cuz it will be automatically installed right on your internal storage. :) if you want to get the older version you can search for it by googling on the web yourself. :p above all, it doesn't matter even Palringo is installed on your internal storage 'cuz it won't harm your device anyway, unless your device has no sufficient of space in its internal storage. nothing to worry though..! :)
 3. Here your Palringo is being installed on your device , just wait until the installation process is done. it takes less than a minute.
 4. Congratulations...!!! Palringo was successfully installed on your device...!!! lol :) Click/select on the ok button to quit the installation progress.
 5. After the installation process (4th step) has been done, now you can see the Palringo app icon on your device program lists. Click on it to start setting up your own Palringo account.
 6. Once you click on the Palringo icon then it brings you to this welcome screen and you can start typing your email address and password to sign up your Palringo account. if you're a new Palringo user then select the option "No, I am a new user" otherwise if you've already had a Palringo account then select the option "Yes, I have a password" and fill in your Palringo account password and then click/select on the Ok button to go to the next step.
 7. When you've typed your email address and clicked/selected on the ok button at the 6th step then it brings you to this screen. just type your email password and confirm it once more time to finish this step and then Click/select on the ok button.
Note: if you have already had a palrigo account and have filled in both of your email address and pasword at the 6th step, then ignore this step.
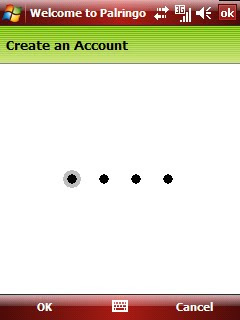
 8. Once you clicked on the Ok button at the 7th step then it brings you to this screen (make sure that your email address and password were filled correctly at the 7th step), and here your account is being created. just wait until this process is done.
 9. Congratulations..!! your Palringo account has been created and you've been logged into the palringo network..!!! lol :) when you see this notification then it means that you're done..!! click/select ok to finish this step and go to the Palringo IM main page.
 10. Once you clicked/selected on the ok button at the 9th step, then it brings you to this screen. here your Palringo account is being logged into the Palringo IM network. just wait until your account is displayed online.
 11. it's now you're Palringo is already online and ready to use.
 12. Click/select on the menu button which is on the bottom right side of your Palringo then select the option "Add service" to start creating your IM services.
 13. Here the Palringo server is searching for the available instant messaging services you can add to.
 14. it's now you can see these various of instant messaging services right on your Palringo that you can add to. click/ select on the service you desire to add. then click/select the Ok button.
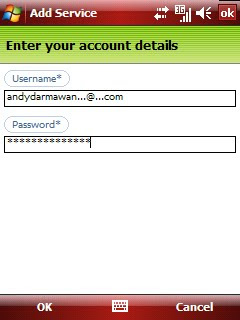
 15. After selecting the service you desire to add at the 14th step, then it brings you to this screen. here you need to enter your instant messaging account details you've just selected at the 14th step correctly then click/select the Ok button to finish this step.
 16. When you've entered your instant messaging account details correctly at the 15th step, then your accounts should be displayed like this (ready to receive any instant messages/online).
 17. To see your online buddies, you can go to the "contacts" which is on the right side of (next to) the Palringo main page. see this screenshot for details.
 18. You can edit your instant messaging services interface settings (visible,invisible,away..etc) or another settings by going to the menu button. see this screenshot for details.
 19. Here I show you some screenshots of the Palringo menu settings that you can edit yourself.
 20. Menu settings screenshots.
 21. Here I show you some screenshots of the Palringo conversation page.
 22. You can send the voice message by scrolling/pointing the input button to the right side of (next to) the "Text" input button. see this screenshot for details.
 23. You can also send a picture message by scrolling/pointing the input button to the right side of (next to) the "Voice" input button. See this screenshot for details.
 24. Palringo has a built in google map who gives you the ability to see another online Palringo users you have added into your Palringo account.
IMPORTANT : Don't ever forget to verify your Palringo account so that you can use your Palringo as well as possible by checking a message sent by Palringo.ltd on your email inbox that you've used/filled in to create your Palringo account at the 7th step above (it won't ask you any cost, so dont worry..!!) =D
O.k then, I think it's enough to me to tell you about How to set up Palringo On your device correctly.
Hope it'll help you.!! Enjoy Chatting..!!! Cheers..!!! :-)
Tidak ada komentar:
Posting Komentar